In today’s fast-paced world of web design, crafting interactive prototypes has become a crucial component of the design workflow. With interactive prototypes, designers can transform their concepts into a tangible reality, evaluate user-friendliness, and obtain valuable input prior to embarking on the development process.
Discover the ultimate guide to crafting interactive prototypes for websites. Our step-by-step process will take you through everything you need to know. Our comprehensive process covers everything from meticulous planning and precise wireframing to stunning design and rigorous testing.
With our expert guidance, you’ll have all the essential tools and knowledge at your fingertips to craft exceptional and interactive prototypes that will leave a lasting impression on your users.
Making Interactive Prototypes: Step-by-Step Guide
1. Understanding the Importance of Interactive Prototypes
Interactive prototypes play a crucial role in the design process, enabling designers to visualize and refine their concepts. These prototypes simulate the functionality of a website, allowing designers to test user interactions, gather feedback, and validate design decisions. By creating interactive prototypes, designers can uncover usability issues early on, leading to improved user experiences and increased client satisfaction. Furthermore, interactive prototypes facilitate effective communication between designers, stakeholders, and developers, ensuring everyone is aligned on the design vision.
2. Planning and Defining Goals
Before diving into the prototyping phase, it’s crucial to define project objectives, understand the target audience, and gather requirements. Conducting thorough user research helps in identifying user needs, preferences, and pain points. By setting clear goals and success criteria for the prototype, designers can focus their efforts and measure the effectiveness of their design solutions.
3. Wireframing: Sketching Out the Blueprint
Wireframing serves as the blueprint for your website design, laying out the structure and hierarchy of content. This step allows you to create a basic skeletal framework that outlines the placement of key elements without getting caught up in visual details. By utilizing wireframing tools and techniques, such as pen and paper or digital wireframing software, you can quickly iterate and refine the structure of your design, ensuring a solid foundation for your interactive prototype.
4. Selecting the Right Tools for Prototyping
Choosing the right prototyping tool is essential for creating interactive prototypes efficiently. There are numerous tools available, each offering different features and capabilities. Some popular options include Adobe XD, Figma, InVision, and Axure RP. Consider factors such as ease of use, collaboration features, and compatibility with your design workflow when selecting the appropriate tool for your needs.
5. Designing Visual Elements and Layouts
Once you have a solid wireframe, it’s time to focus on the visual design of your prototype. Create a visual design system that encompasses typography, colors, imagery, and other visual elements that align with your brand and target audience. By designing intuitive and user-friendly layouts, you can ensure that users can easily navigate and interact with your prototype.
6. Adding Interactions and Animations
The true power of interactive prototypes lies in their ability to simulate user interactions and animations. Utilize the features of your chosen prototyping tool to add interactive elements such as buttons, menus, forms, and transitions. Incorporating animations can enhance the user experience by providing visual feedback and making interactions feel more realistic.
7. Creating Responsive Prototypes
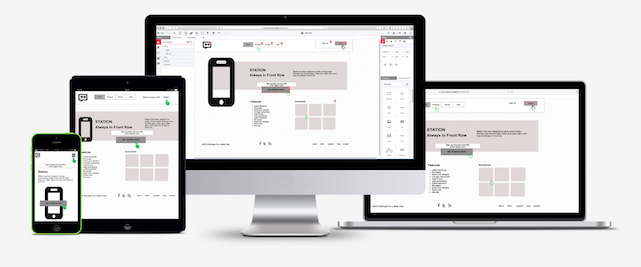
In today’s multi-device world, it’s crucial to design responsive prototypes that adapt to different screen sizes and devices. Consider how your design will scale across various devices and use responsive design techniques to ensure a consistent and enjoyable user experience across platforms.
8. Testing and Gathering Feedback
Usability testing is a critical step in the prototyping process. Conduct user testing sessions to observe how users interact with your prototype, identify pain points, and gather valuable feedback. This feedback will help you refine your design and address any usability issues before moving on to the development phase.
9. Refining and Iterating the Prototype
An interactive prototype is never truly finished. Analyze the feedback received during testing and identify areas that can be improved. Iterate on your design, making necessary adjustments and refinements to enhance the user experience and address any usability concerns. Aim for consistency and coherence throughout the prototype to ensure a seamless and intuitive user journey.
10. Handoff and Collaboration with Developers
Collaboration with developers is essential for a smooth transition from design to development. Clearly document design specifications and guidelines to facilitate communication and ensure that your vision is accurately translated into the final product. Collaborative tools and effective communication channels help streamline this handoff process and foster a productive partnership.
The Bottom Line
Creating interactive prototypes is a crucial step in the website design process. By following the steps outlined in this guide, you’ll be equipped with the knowledge and resources to create impressive and user-friendly prototypes. Remember, prototyping is an iterative process, so embrace experimentation, gather feedback, and continuously refine your designs to achieve the best possible user experience. With interactive prototypes, you can confidently present your ideas, engage stakeholders, and build a solid foundation for successful website development. Happy prototyping!


